Membuat Pesan pengingat pada windows,

Berikut langkahnya :
1. Buka Start Menu, ketik taskschd.msc, dan tekan Enter.
2. jika keluar pesan UAC, kemudian click tombol Yes (Windows 7) atau Continue (Vista).
3. Pada sisi kiri, click pada folder Task Scheduler Library, kemudia click pada Create Task di sisi kanan . (lihat gambar dibawah)


A) Pilih bagaimana sering pesan akan muncul untuk mengingatkan. (lihat gambar dibawah)


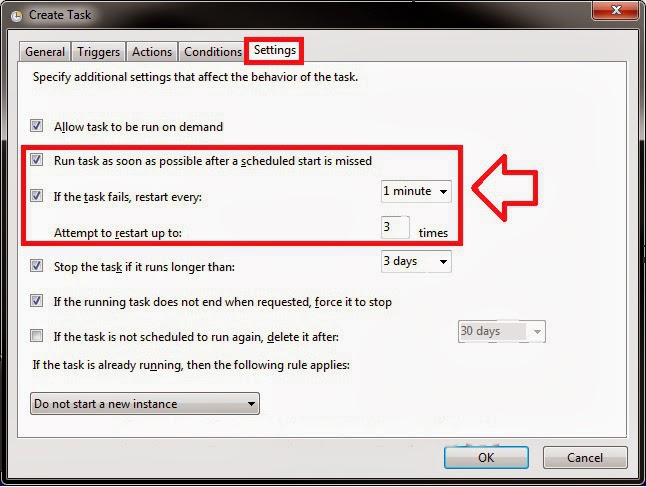
12. Click pada tab Settings, check kotak Run task as soon as possible after a scheduled start is missed , dan check kotak If the task fails, restart every: . (lihat screenshot dibawah)

Berikut langkahnya :
1. Buka Start Menu, ketik taskschd.msc, dan tekan Enter.
2. jika keluar pesan UAC, kemudian click tombol Yes (Windows 7) atau Continue (Vista).
3. Pada sisi kiri, click pada folder Task Scheduler Library, kemudia click pada Create Task di sisi kanan . (lihat gambar dibawah)
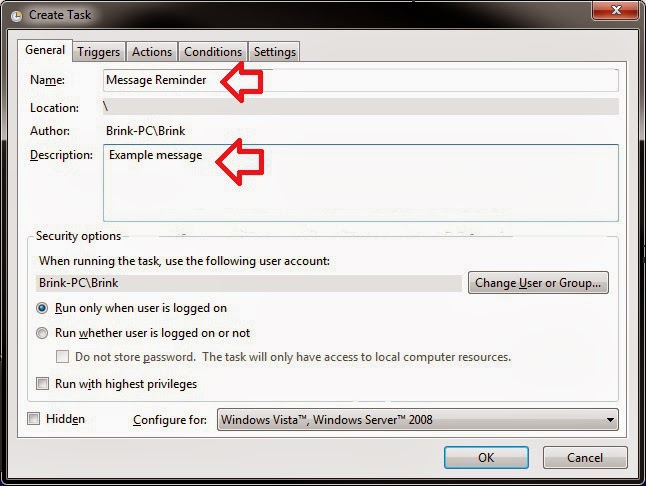
4. Pada General tab, Ketik Name dan Description (lihat gambar dibawah)
5. Jika anda ingin merubah siapa user or group pengingat pesan ini akan muncul, atau secara default dari account anda, kemudian click pada tombol Change User or Group dan ikuti langkah pada screenshot dibawah untuk memilih a user or group. Jika Tidak, kemudian lewati langkah ini dan lanjut ke langkah berikutnya.

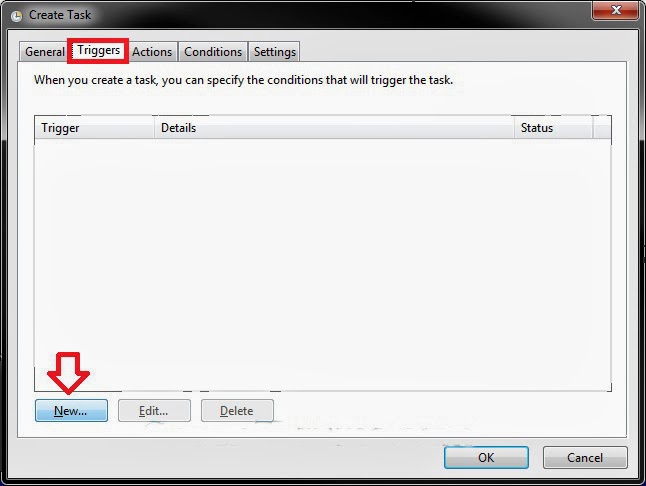
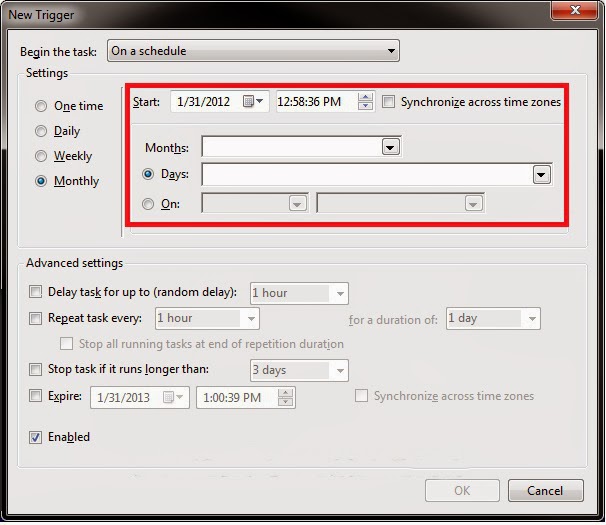
6. Click pada tab Triggers, dan click pada tombol New. (lihat gambar dibawah)
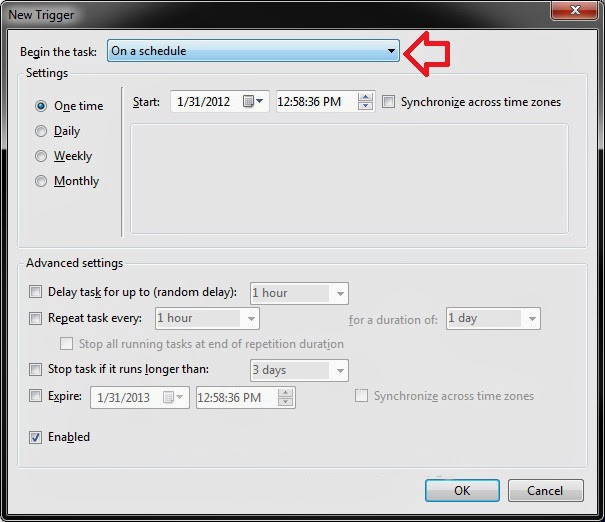
7. Jika belum ada yang terpilih, kemudian pilih On a schedule. (lihat screenshot dibawah)
NOTE: anda dapat memilih sesuai dengan kebutuhan anda, tetapi saya hanya membuat contoh. jika anda memilih opsi yang berbeda, kemudian anda akan memilik perbedaan setting pada salah satu langkah pada 7A-7B dibawah ini.
NOTE: anda dapat memilih sesuai dengan kebutuhan anda, tetapi saya hanya membuat contoh. jika anda memilih opsi yang berbeda, kemudian anda akan memilik perbedaan setting pada salah satu langkah pada 7A-7B dibawah ini.
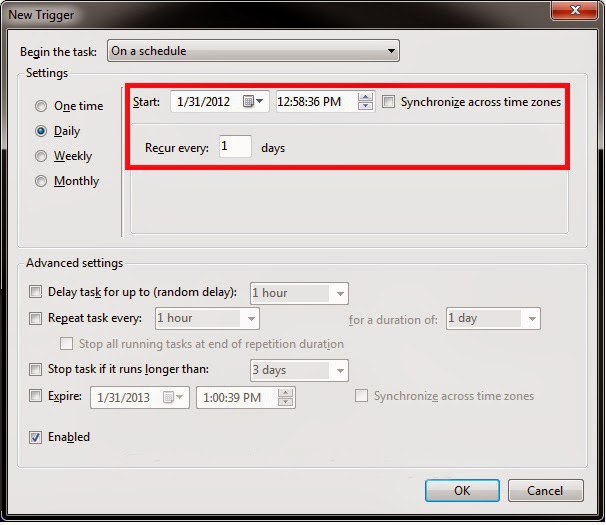
B) Tergantung pada apa yang anda pilih di langkah 7A, pilih and set Ketika (cth: date and time) anda inginkan pesan akan muncul untuk mengingatkan anda. (lihat gambar dibawah)
C) Ketika selesai, click tombol OK. (lihat gambar diatas)
8. Click pada tab Actions, dan click pada tombol New. (lihat screenshot dibawah)
9. Pilih tombol New, Pilih display message, kemudian ketik title dan message yang akan muncul.
10. Click pada tab Conditions, uncheck kotak Stop if the computer switches to batter power , dan uncheck kotak Start the task only if the computer is on AC power . (see screenshot dibawah)
12. Click pada tab Settings, check kotak Run task as soon as possible after a scheduled start is missed , dan check kotak If the task fails, restart every: . (lihat screenshot dibawah)
13. Click on OK.
14. Sekarang anda akan melihat hasilny dalam folder Task Scheduler Library
NOTE: Anda akan selalu dapat merubah atau menghapus task ini.
NOTE: Anda akan selalu dapat merubah atau menghapus task ini.

